

Coloring is all about creativity and finding new ways to bring your images alive. I like exploring to find something new, even if it is just new to me trying it out. Coloring folds and translucent clothing is something that I have wanted to incorporate when I color My Besties because the clothing is so fun and usually has tons of layers

When I color I flip flop between starting with my dark colors first and other times I start with my light colors. Her I have outlined where I wanted my folds to be placed

Going over my first color and flicking out into the white space

Continue...
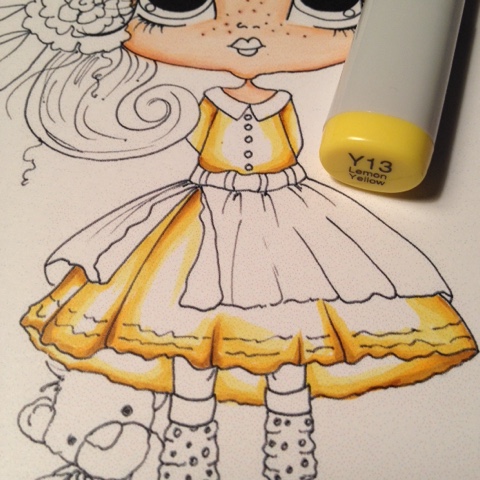
Continue...

and continue even further, finally going over the whole image with Y00 to blend in all the colors. At this point I allow Y00 to fully dry and add repeat with previous colors where I want to add more depth

Using this last color, go over the whole apron allowing all colors to blend. Once this color is dry repeat using the previous color to deepen the shadows

Using the lightest color Y00 I color in the apron not taking the color to the edges, leaving white space.
Using my top coat I went with W00 and went over the whole apron not alot because I did not want to have the 2 colors blend

Shop this image here
Thank you for stopping by the blog...where "creating something handmade" is always fun
SKIN: E000, E00, E11, E21
HAIR: E33, E35, E37, E39, E49SKIN: E000, E00, E11, E21
EYES: YG91, BG93, BG96
LIPS: R22
LIPS: R22
DRESS: Y00, Y11, Y13, Y15, Y17, YR23,
B95, B97, B99
W00, W0, W1, W2
TEDDY BEAR: E000, E11, E21, E51
BOW: YELLOW COMBO
BOW: YELLOW COMBO
FLOWER: RV17, RV19
DEEP SHADOWS: WALNUT STAIN DISTRESS INK
CHEEKS: CHALK
DEEP SHADOWS: WALNUT STAIN DISTRESS INK
CHEEKS: CHALK


